Learn how to efficiently clear the Delivery Optimization cache in Windows to enhance system performance. Follow these easy steps for a smoother experience
Have you ever encountered sluggishness or storage issues on your Windows PC? One of the less-known culprits might be the Delivery Optimization Cache. This cache, responsible for facilitating quicker downloads and updates, can accumulate and take up valuable space over time. But fear not! Clearing this cache is a straightforward process that can help optimize your system’s performance.
Understanding Delivery Optimization Cache
Delivery Optimization is a Windows feature that helps users download Windows updates and Microsoft Store apps more efficiently. It works by using the internet bandwidth of multiple devices to speed up the download process. As a part of this process, Windows stores temporary files in the Delivery Optimization Cache.
Why Clear the Cache?
Over time, the cache can grow significantly and occupy a substantial amount of disk space, potentially leading to slower system performance or storage issues. Clearing the cache not only frees up space but can also resolve issues related to failed or stuck updates.
Steps to Clear the Delivery Optimization Cache
Here’s a step-by-step guide to clearing the Delivery Optimization Cache:
Method 1: Using Settings
For Windows 10
- Open Settings: Click on the Start menu, then click on Settings (the gear icon).
- Go to Update & Security: In the Settings window, select “Update & Security.”
- Navigate to Delivery Optimization: From the left sidebar, choose “Delivery Optimization.”
- Clear Cache: Under the ‘Download settings’ section, click on “Advanced options.”
- Clear Cache: Here, you’ll find an option to “Clear cache.” Click on it to initiate the process.
For Windows 11
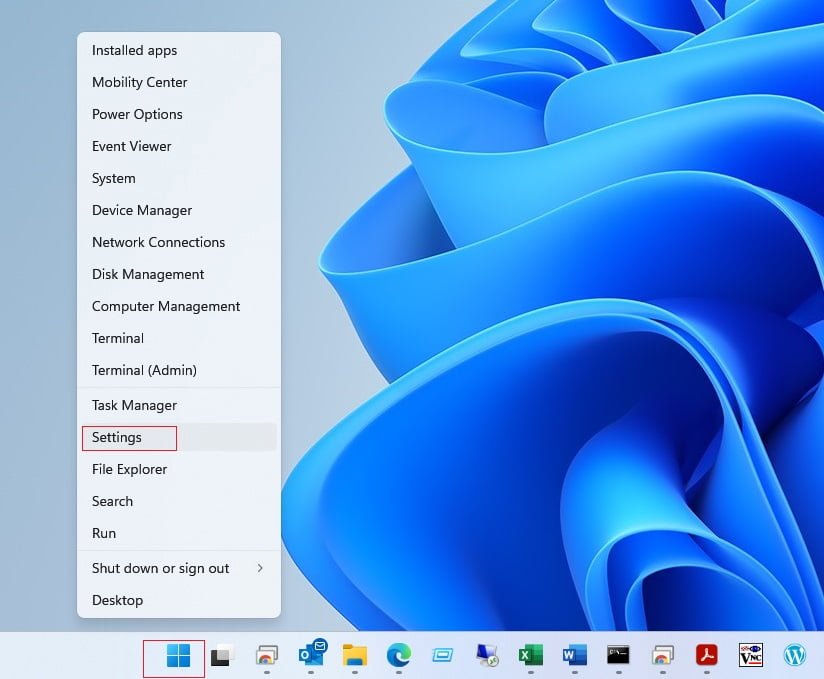
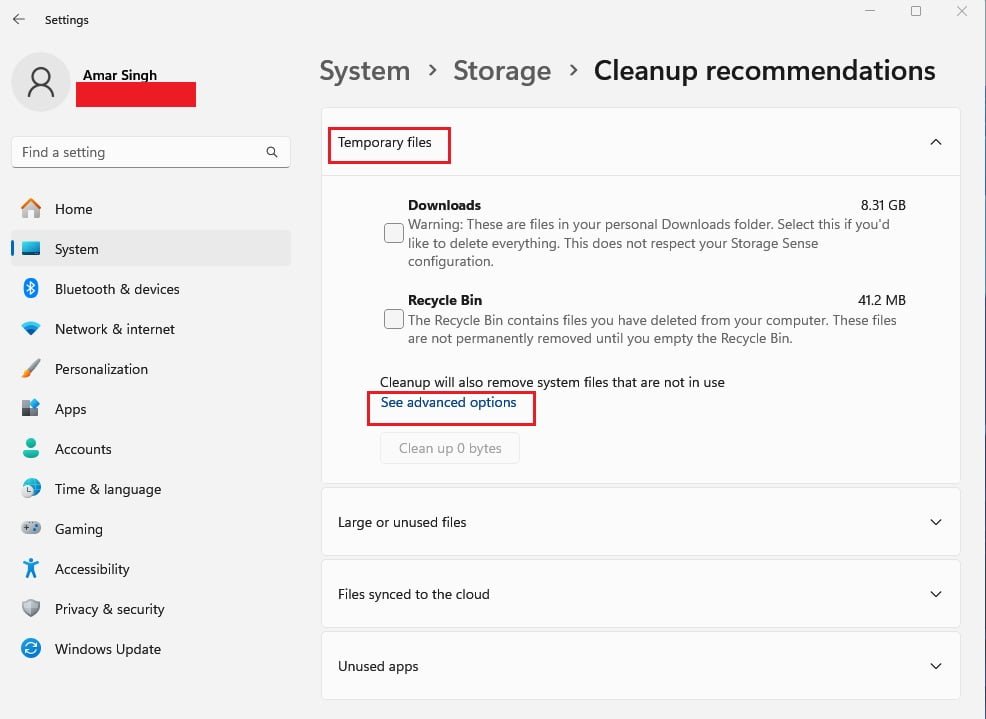
1. Open Settings: Right Click on the Start menu, then click on Settings
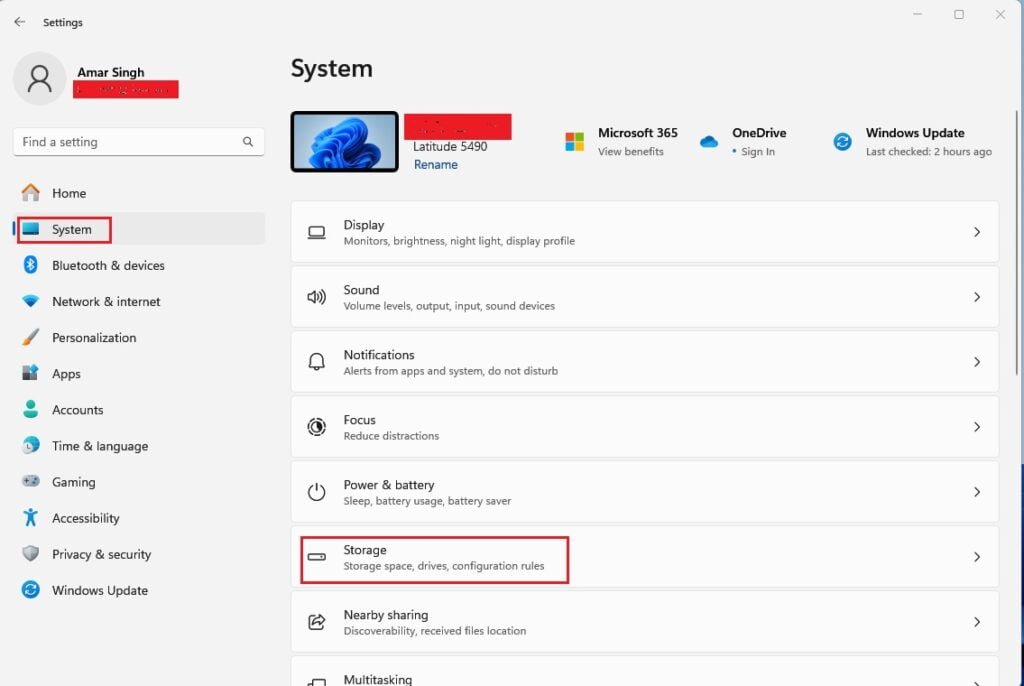
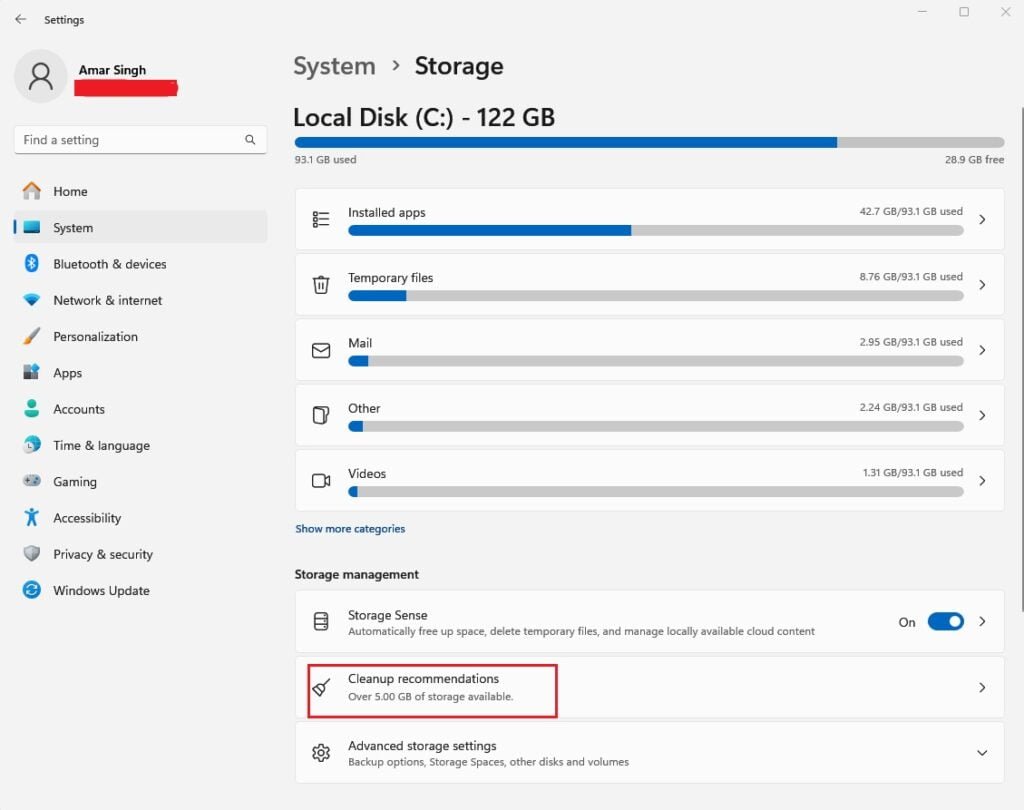
2. Select System: Click on Storage, then click on “Cleanup recommendations“, then click on “Temporary files”, then Click on “See advanced options”, Look for “Delivery Optimization Files” in the list and check the box next to it. Click on “Remove files”, then click on Continue.
Method 2: Using Disk Cleanup
For Windows 10
- Open Disk Cleanup: Type “Disk Cleanup” in the Windows search bar and select it from the results.
- Select System Files: Click on “Clean up system files.”
- Choose Delivery Optimization Files: Look for “Delivery Optimization Files” in the list and check the box next to it.
- Initiate Cleanup: Click OK and then “Delete Files” to confirm.
For Windows 11
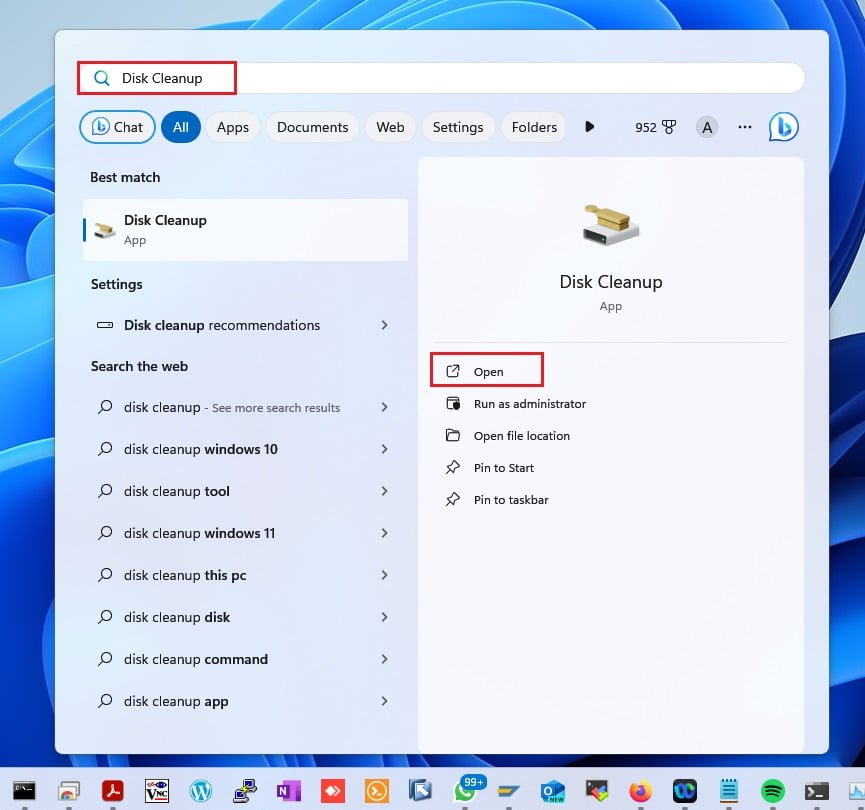
1. Open Disk Cleanup: Click on Start Menu, then Search “Disk Cleanup” and open it from the results.
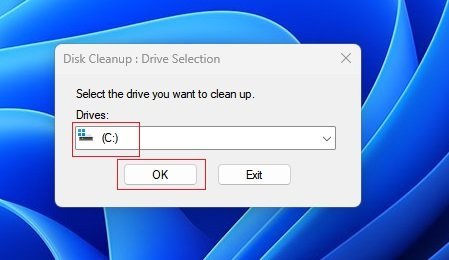
2. Select Drive (C:), then click on OK
3. Choose Delivery Optimization Files: Look for “Delivery Optimization Files” in the list and check the box next to it.

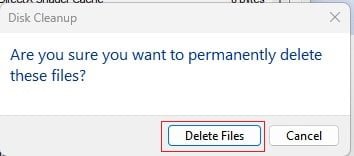
4. Initiate Cleanup: Click OK and then “Delete Files” to confirm.
Method 3: Using Command Prompt
- Open Command Prompt: Type “cmd” in the Windows search bar, right-click on Command Prompt, and select “Run as administrator.”
- Enter Command: Type or paste the following command and press Enter:
rd /s /q %windir%\softwaredistribution\deliveryoptimization- Wait for Execution: Allow the command to execute. Once done, the Delivery Optimization Cache will be cleared.
Conclusion
Regularly clearing the Delivery Optimization Cache and other temporary files helps reclaim disk space and maintain smooth system performance on your Windows PC.
By following these steps, you can easily clear the Delivery Optimization Cache on your Windows system, keeping it clean and optimized for better performance.