In Windows 10, Microsoft is introducing many new features to make users more productive, such as a new Start menu, Cortana, new universal apps, Settings, which is the central place to configure the operating system, ultimately designed to replace Control Panel, and much more. The software giant is also introducing Microsoft Edge, the new default web browser built for the future web and to replace Internet Explorer (which it\’s still present for compatibility purposes).
Microsoft Edge is a completely new web browser with a minimal design that focus on web content, and like Chrome and Firefox, the software maker plans to match and surpass the features available from its competitors with extensions, web notes, tab preview, Cortana, and more.
While the web browser works quite alright without major problems, it’s still in the early days. Some users may run into some issues, such as sudden crashes, slow performance, or simply it won’t launch.
If you were running Chrome or Firefox, and you’re having similar issues, you should try to uninstall and reinstall the web browser to try to resolve the problem. However, like Internet Explorer, Microsoft Edge is part of Windows 10. It\’s nearly impossible to uninstall the app, and even if you could, you might run into different issues.
If you are having problems with the new web browser, you can try resetting the instance of Microsoft Edge in your account to try to fix the issue you’re having.
Of course, we would only recommend you do this as a last resort process, where you have tried everything else and nothing worked.
Warning: Using this guide might cause you lose your favorites, history, and settings. Before, you move forward, it\’s recommended that you perform a full backup or create a system restore point in case something goes wrong and to need to restore your last good known state of Windows 10.
Fixing Microsoft Edge
Learn how to reset Microsoft Edge in Windows 10 when it’s not working correctly. Follow these steps to fix common browser issues and restore its functionality
1- If you’re running Microsoft Edge, close it.
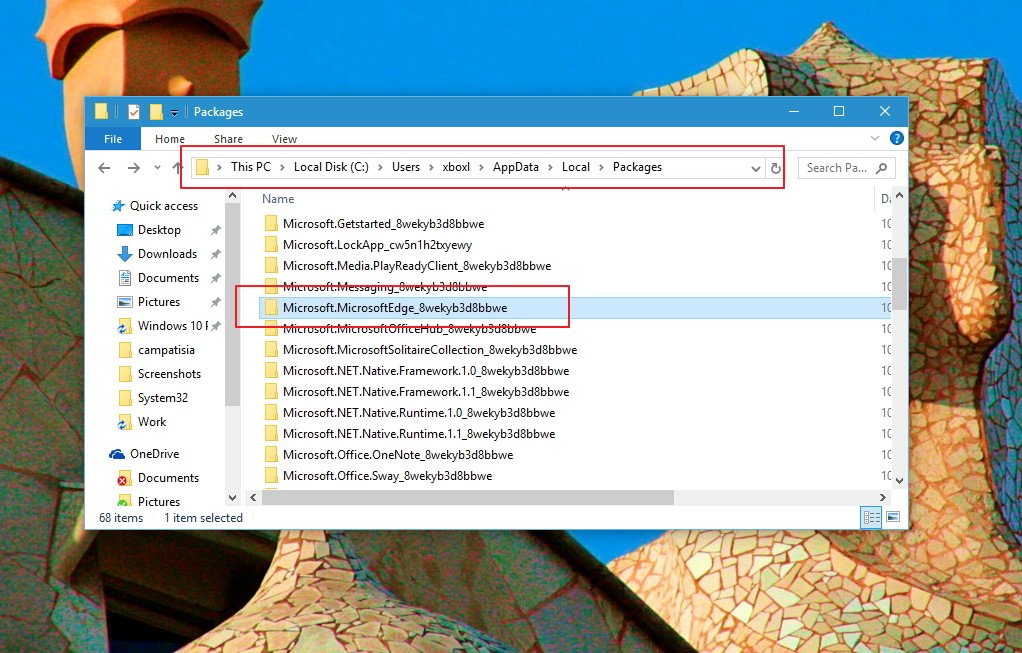
2- Open File Explorer and type the following path into the address: C:\Users\UseYourUsername\AppData\Local\Packages and hit Enter. (Remember to replace “UseYourUsername” with your user account name.)

3- Select and try to delete the Microsoft.MicrosoftEdge_8wekyb3d8bbwe folder as you would with any other folder. If you get a “Folder Access Denied” prompt, simply click Continue. Also, there might be some content that you won’t be able to delete. If this is the case, in the dialog box, select to skip the files.

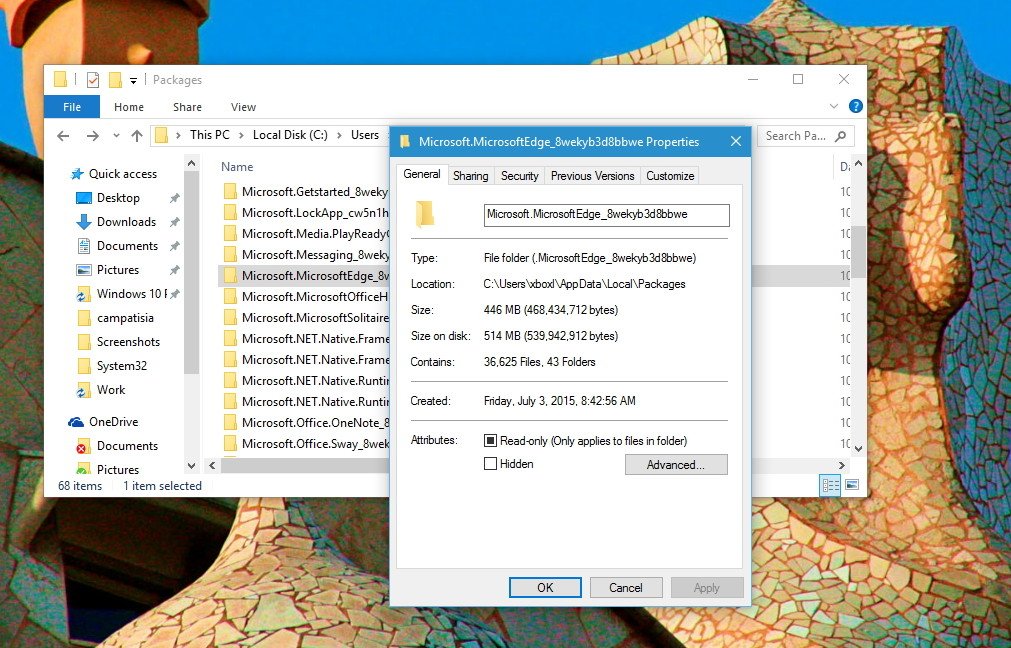
You should be able to delete most of the content inside the folder, but if you can\’t right-click Microsoft.MicrosoftEdge_8wekyb3d8bbwe, select Properties, remove the check from the Read-only option, and click Apply and OK.

4- Once you’ve tried deleting all the content, go inside the Microsoft.MicrosoftEdge_8wekyb3d8bbwe folder and try deleting the remaining folders by selecting all the folders, right-clicking them, selecting Delete, and clicking Yes to confirm the deletion. You may notice that you can\’t delete AC folder, but that\’s alright.
5- Restart your computer.
6- Now, were going to re-register Microsoft Edge in your account. Open the Start menu, search for Windows PowerShell, right-click it from the result, and select Run as administrator.
7- Type the following command and hit Enter:
cd C:\Users\UseYourUsername. (Remember to replace “UseYourUsername” with your user account name.)
Then, type the following command exactly and hit Enter:
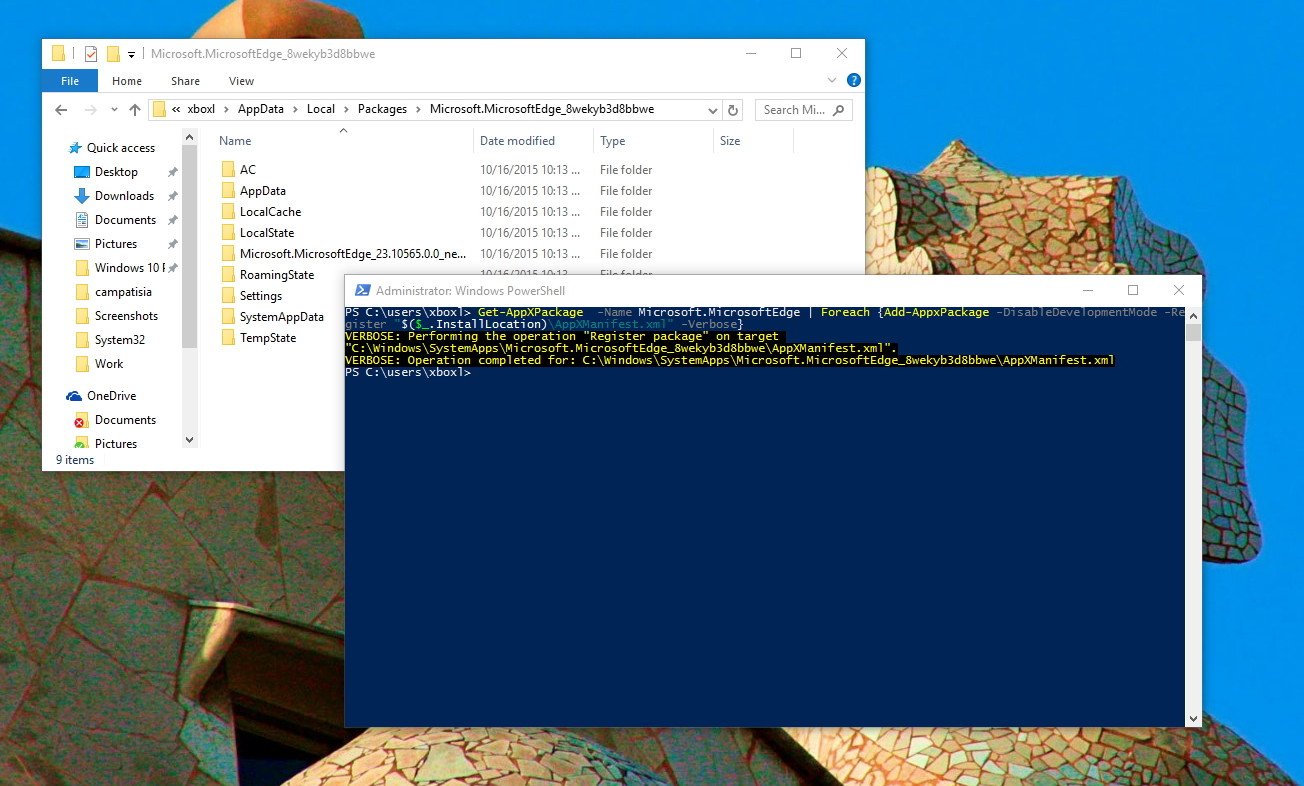
Get-AppXPackage -AllUsers -Name Microsoft.MicrosoftEdge | Foreach {Add-AppxPackage -DisableDevelopmentMode -Register “$($_.InstallLocation)\AppXManifest.xml” -Verbose}
If the process was completed successfully, you would see a message similar to this one:

That’s all there is to it. If you want to be cautious, restart your computer one more time, and then you should be able to run Microsoft Edge again and hopefully without any issues.